Today I will write about Jenkins, a very popular java-based tool that is used mainly for continuous integration and continuous deployment (CI/CD). Jenkins is an open source web application, meaning that it’s basically maintained by the community and free of cost.
Wait, what is CI? What is CD?
Let’s look at the definitions:
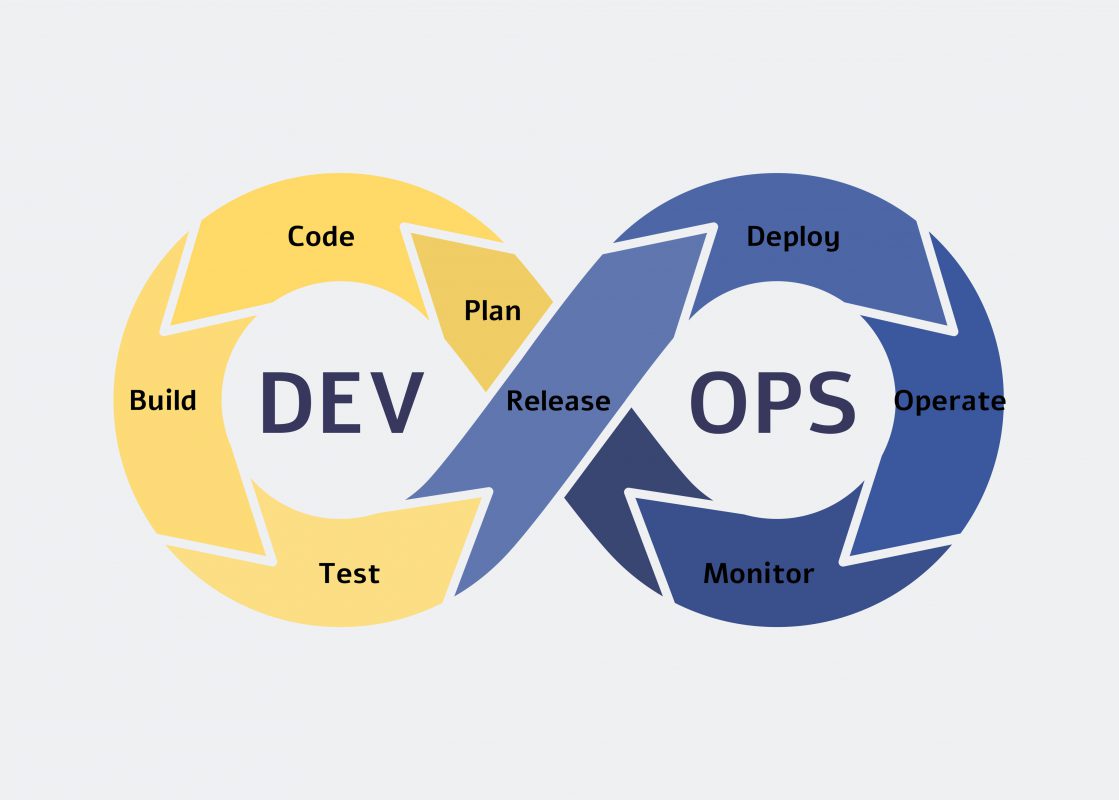
CI and CD are procedures that help organizations to accelerate the software development process through automation. These procedures allow users to receive a new version of the software in a faster way and more frequently.
Continuous Integration (CI) is a procedure used in software development that requires the developers to commit their changes to a central shared repository as soon as they have a working version of the code. This could happen several times a day. Every new committed version of the software is then automatically verified and build. This continuous integration allows the developers to easily identify errors at an early stage of the development.
Continuous Deployment (CD) on the other hand is a process that ensures that the changes made to the code are correctly delivered and applied to the different environments in the organization. The objective is to make new versions available for end users in the production system. CD must be performed automatically. In order to be successful, the code must be properly and carefully tested in the pre-production environments.
We can use Jenkins to look into our shared repositories for all changes in our development, then use it to build a new software version, apply test cases, and finally deploy the software to the production system.
Why is Jenkins so popular? what are the advantages of Jenkins against other similar applications?
In my opinion the most important feature of Jenkins is that it is an open source tool: it is entirely free. The tool is also a java application, and therefore is portable, as well as easy to install, configure and maintain. The documentation is quite extensive, and if you have any problem you can always ask the community for support.
For Jenkins to be able to perform CI/CD it needs to interact with other tools for different tasks like repository management, version control, application building, application testing, monitoring, etc. There are many tools on the market that can perform these tasks, and Jenkins provides more than 1000 plugins to allow for integration with the vast majority of them.
In the next image we can see that Jenkins can integrate with other popular tools responsible for different DevOps processes:

Enough with the theory, it is time to try Jenkins, but how do you get it?
There are two ways to install Jenkins in our environment. We can install it as a service using the following commands (CentOs or RHEL):
$sudo yum install jenkins
$sudo service jenkins start
Or we can download the war file from the Jenkins homepage an deploy it in our preferred web-server.
Once the war file is deployed, we browse to the following site to finish the configuration: http://localhost:8080
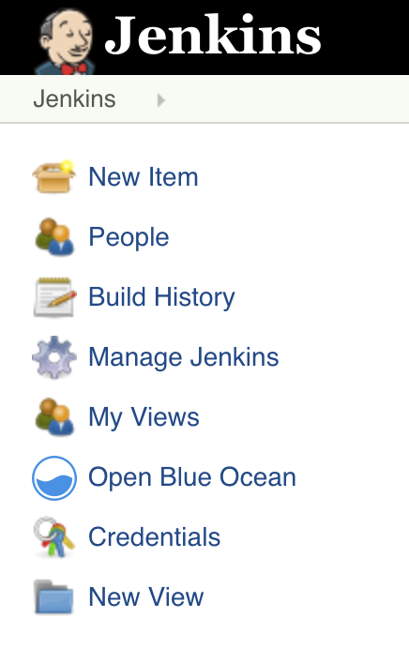
If the installation was successful, we can look at the home page with the Control Panel:
It is important that we access “Configure Global Security” in “Manage Jenkins”, and that we disable the “Allow users to sign up” which prevents 3rd parties from accessing the Jenkins console.
Jenkins is now running, how to use it?
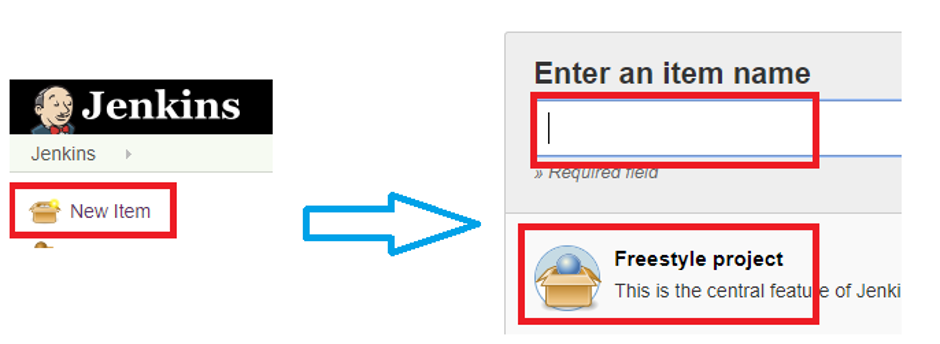
The easiest way to use Jenkins is to create a new Freestyle project:
In this type of project, we will be able to create a basic project in Jenkins, all the configurations are made with the help of the graphical IDE:
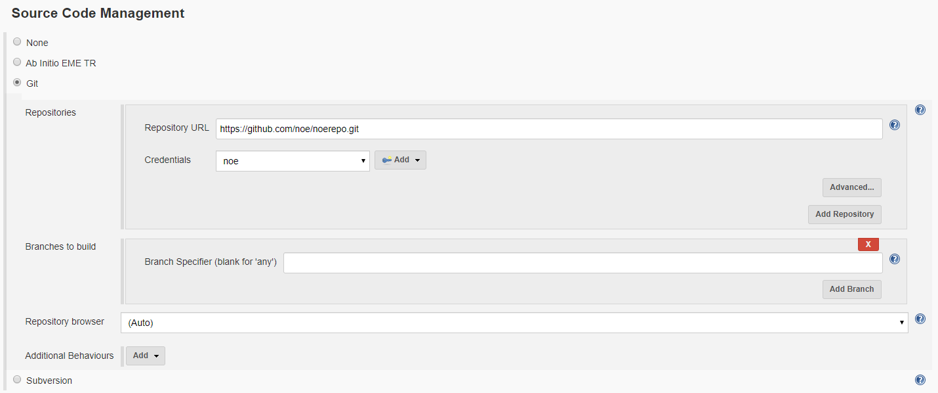
- Configure the repository where we want to look for the changes in the code:
-
- Set the poll interval of the repository:
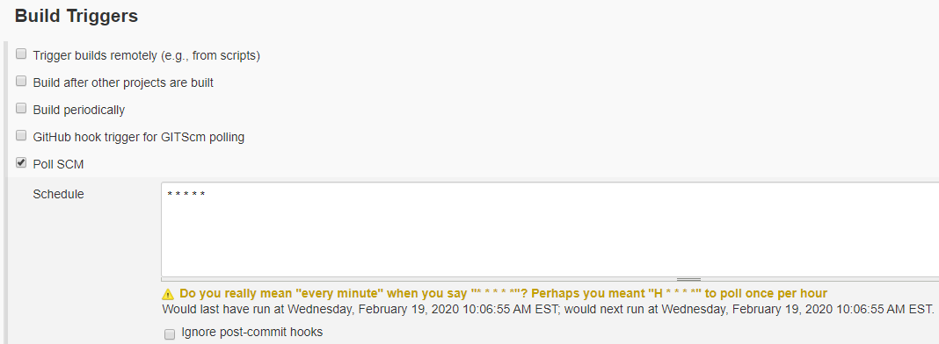
- Set the poll interval of the repository:
-
- Define how to build our application. We can execute shell scripting for Linux servers, batch for Windows, or call other application like Maven.
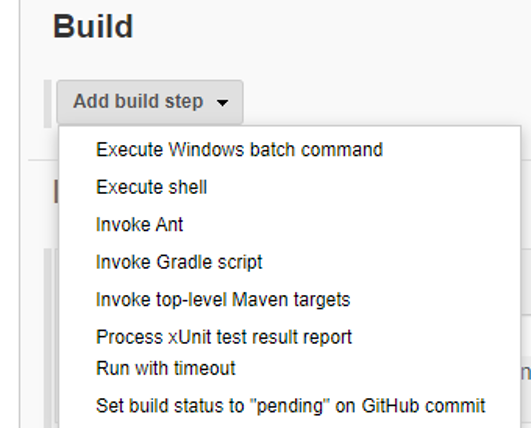
- Define how to build our application. We can execute shell scripting for Linux servers, batch for Windows, or call other application like Maven.
- Finally we configure the next steps after the build is made, call another job, send a notification via slack or mail, read XUnit test results, etc:

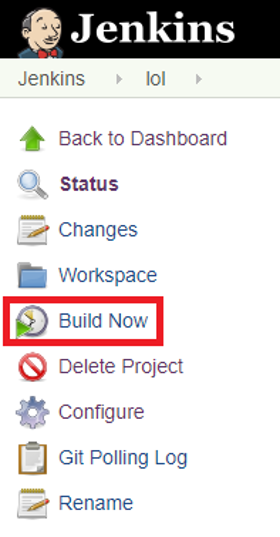
After all the configurations are finished, we click on Save and run the project clicking on “Build Now”, this Project will execute in the server where Jenkins is currently installed and running.

That was easy, but now I need to deploy my work to other servers, how can I configure them?
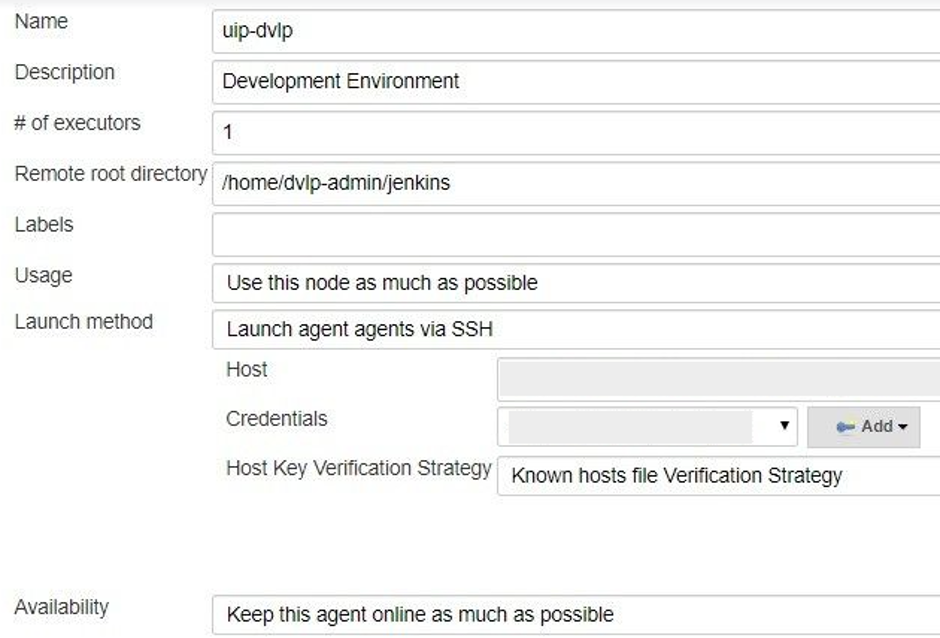
We can do that easily. We just need to tell Jenkins how to connect from the installation server (master) to the other servers (nodes), in “Manage Jenkins” → “Manage Nodes” we create the nodes that we are going to use in our project. We then write the host name, and provided the appropriate credentials to log in to the servers:
We need to check the node log to ensure the connection was successful.
The graphical interface is good, but is quite limited. Is there a way to code instructions in Jenkins?
The answer is “Yes, of course”. And with this we finally get to the most powerful feature of Jenkins, “Jenkins Pipeline Scripting” (JPS). But first, a pipeline is a workflow where we define how, where and when to execute the different jobs defined in our Jenkins environment. This pipeline is coded using a programming language called Groovy, so creating a pipeline using Groovy syntax for Jenkins is called “Jenkins Pipeline Scripting”.
We create a new project to use JPS, such as a Freestyle project, but this time we select Pipeline:

The main difference with the previous project is that this time we have a space where we can paste our groovy code:

We can click on Pipeline Syntax to get information on how to use different plugins that we have installed in Jenkins.
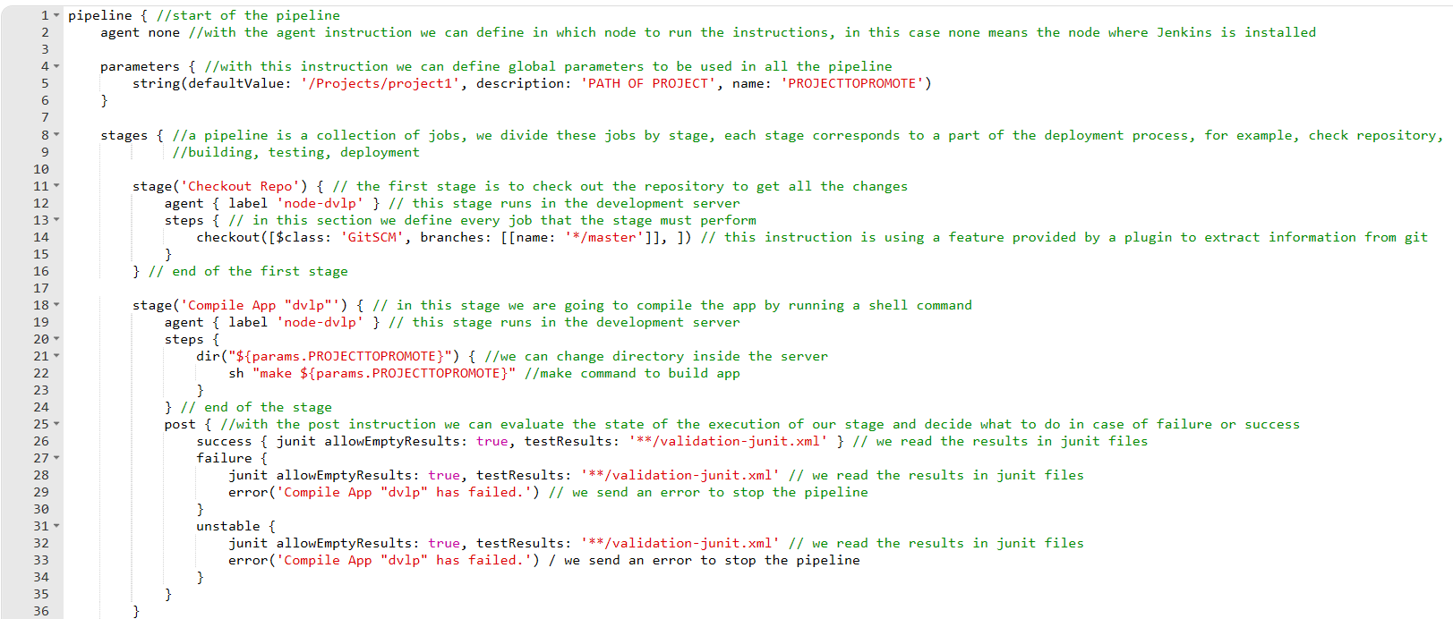
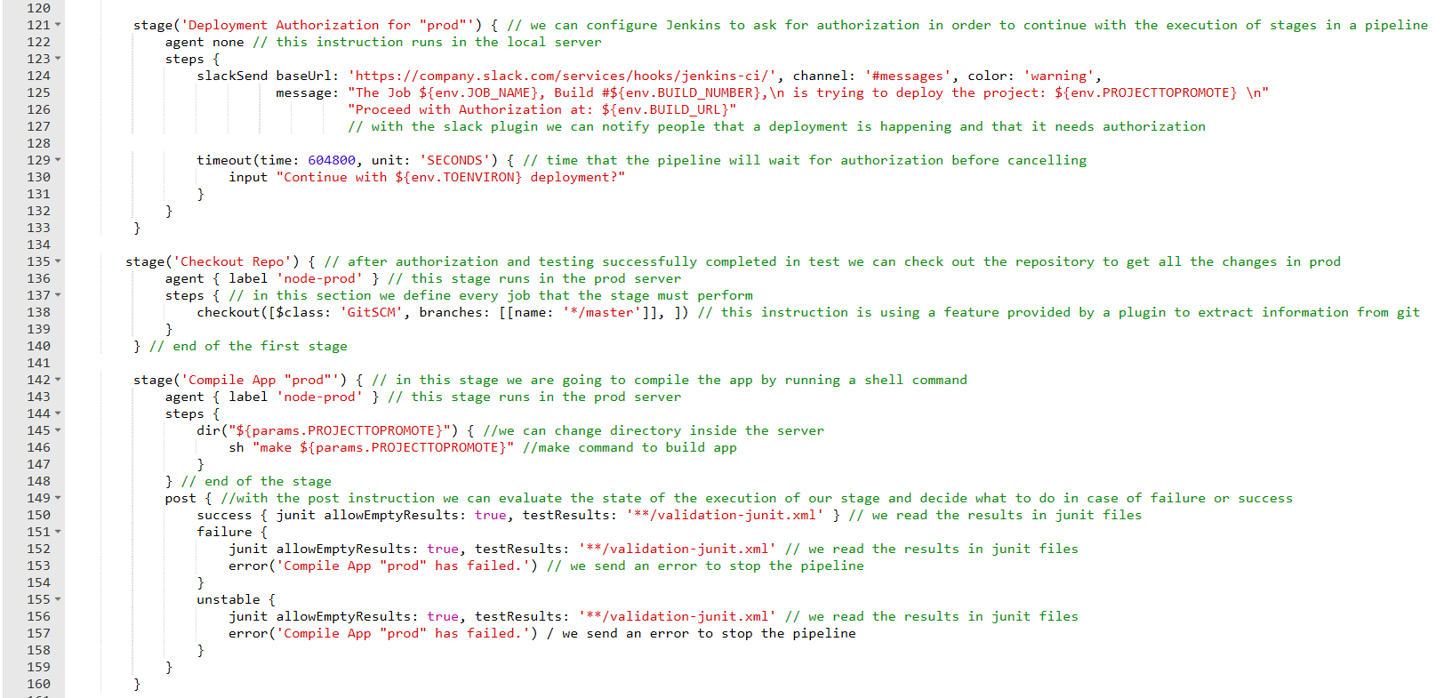
So let’s have a look at a complete pipeline used to integrate, test and deploy an ETL application. This way we can explain the advantages of doing JPS – (the comments in the code explain every instruction):


After we are finished coding our pipeline, we save the project and build the project exactly as we did with the previous one.
After running our pipeline a couple of times, Jenkins will show us the statistics of every stage, and the most recent behavior:
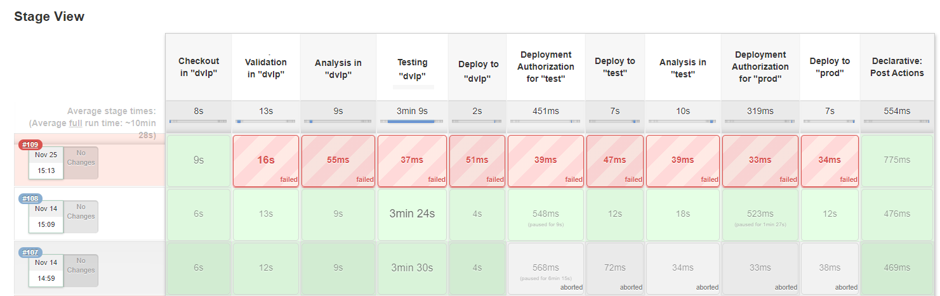
In the last execution we can see an error in the validation case causing the whole pipeline to fail. In the second execution all stages were executed correctly, meaning that the deployment was successful. In the third execution a user did not authorize the deployment, causing the abortion of the pipeline.
And that is all for today. In conclusion Jenkins is a very powerful tool that can help us to not only save time and effort, but also to execute cleaner and safer deployments.
Thank you! But I have more questions!
Well, the intention of this document is just to give a general idea of what Jenkins is, and to show how easy it is to use it. For more information, tutorials, documentation we can always check the official website: https://jenkins.io/doc/

