
There are several ways to deploy resources in Azure, but to do it in the most secure and optimal way, we do not have many options. This article presents a solution that streamlines and simplifies the access management for organizations using GitHub repositories and Terraform for automated deployment to Azure.
Access to managed Azure Resources
When we are talking about the continuous integration/continuous deployment for Azure resources, using the service principals (SP) is the only way to achieve it. In our case, a service principal is the identity used by the automation tools and determines which resources can be used at which level. In comparison, a user account can only be used to run interactive deployment, which requires the user to log in to Azure first. As the service principal can be used to run deployment pipelines from Azure DevOps, GitHub or any other automation solution, the main question will be how to organize access to Azure resources in a secure way. There are two ways the SP can be used to grant access to managed Azure resources: directly through the subscription or the Key Vault.
 The simplest way is shown in the picture above. Deployment server connects Azure subscription using SP and deploys resources based on the assigned permissions. In this case, all deployment pipelines that have direct access to subscriptions can create, modify, or remove Azure resources. Another approach is to connect the deployment server to the subscription with read-only permissions and keep service principal credentials that have the required permissions for deployment in the Key Vault, as shown in the following diagram:

This approach gives us more control over alterations, because the deployment server does not have direct modifying permissions to resources in Azure. Using different service principals for various projects or repositories increases security, but also the complexity of managing the service principals. To avoid unnecessary complications, the subscriptions with development or proof-of-concept environments should use the first authentication method with a service principal assigned the role of the owner to facilitate deployment from each repository. It makes sense to create a service principal for each deployment service, like GitHub or Azure DevOps. The second method is suitable for a production environment where control over deployments is more important. The first approach can also be used, but we need to carefully define the role and scope on both sides, Azure and the deployment service. The service principal name must contain information about the purpose to be easily identifiable for auditing and monitoring. A recommended pattern for naming is:
sp-<subscription|application|project>[-<deployment server>]-<role>[-<environment>]Although the use of spaces is acceptable, you should avoid them for better readability and to prevent problems with validation rules. To follow along you will need an Azure account with a ready to use Azure CLI, an Azure Key Vault and a GitHub repository.
Connect Actions to Azure in GitHub
According to the Microsoft documentation Connect GitHub and Azure | Microsoft Docs, there are two different ways for GitHub Action authentication with Azure:
- OpenID connect with an Azure service principal using a Federated Identity Credential
- Using service principal with secrets
The first method defines GitHub scopes (organization/repo/branch) in the service principal configuration while the second one requires creating secrets in each repository that demands access to Azure subscription. Regardless of which method you choose, you will first need a service principal. If we have an Azure subscription datainsights-external-dev, and the service principal has the contributor role on this subscription for GitHub service, the name will be the following:
sp-datainsights-external-dev-github-contributor
1. Create GitHub Service Principal
To create a service principal, we can use the following AZ CLI command:
sp="sp-datainsights-internal-dev-github-contributor"
subscription="datainsights-internal-dev"
az ad sp create-for-rbac \
    --name $sp \
    --role contributor \
    --scopes /subscriptions/$(az account show \
                                  --subscription $subscription \
                                  --query id \
                                  -o tsv)
The command not only creates the SP, but also attaches the contributor role to the subscription and provides security details in the output, which will look like the following:
{
    "appId": "00000000-0000-0000-0000-000000000000",
    "displayName": "sp-datainsights-internal-dev-github-contributor",
    "name": "",
    "password": "0000-0000-0000-0000-000000000000",
    "tenant": "00000000-0000-0000-0000-000000000000"
}
This information will be needed for further steps, so keep it handy.
2. Create the connection between GitHub and Azure
As mentioned above, there are two ways to connect the tools:
a) Use the Azure login Action with OpenID connect
To use OpenID Connect, we first need to run the next command, which enables federation with GitHub to trust the repository:
APPLICATION_ID="00000000-0000-0000-0000-000000000000"
OBJECT_ID=$(az ad app show --id $APPLICATION_ID --query objectId -o tsv)
CREDENTIAL_NAME="githubCredential"
REPO="repo:DataInsightsGmbH/azure-terraform:ref:refs/heads/main"
az rest --method POST --uri "https://graph.microsoft.com/beta/applications/$OBJECT_ID/federatedIdentityCredentials"
    --body "{
                'name':'$CREDENTIAL_NAME',
                'issuer':'https://token.actions.githubusercontent.com',
                'subject':'$REPO',
                'description':'Testing Github Azure Connection',
                'audiences': ['api://AzureADTokenExchange']
            }"
Be careful: the issuer must not contain any slashes at the end. It is useful to set a descriptive name for the CREDENTIAL_NAME and use the description field to provide more details. The subject field can be defined, depending on the repository workflow. For repositories that use GitHub environments:
repo:<Organization/Repository>:environment:<Name>For repositories with reference to branch or tag:
repo:<Organization/Repository>:ref:<ref path>An example of the last point would be:
repo:DataInsightsGmbH/azure-terraform:ref:refs/heads/mainNext, we use GitHub Actions, the CI/CD tool provided by GitHub. Before we create the Action, we need to create the secrets that will allow us to connect to Azure:
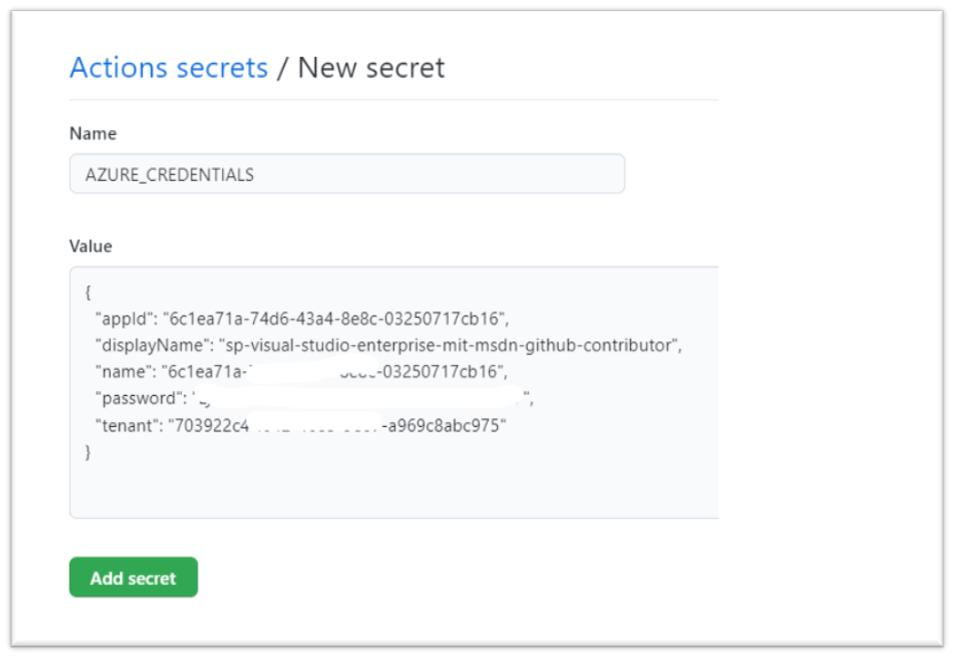
AZURE_CLIENT_ID, which is theappIDAZURE_SUBSCRIPTION_IDAZURE_TENANT_ID
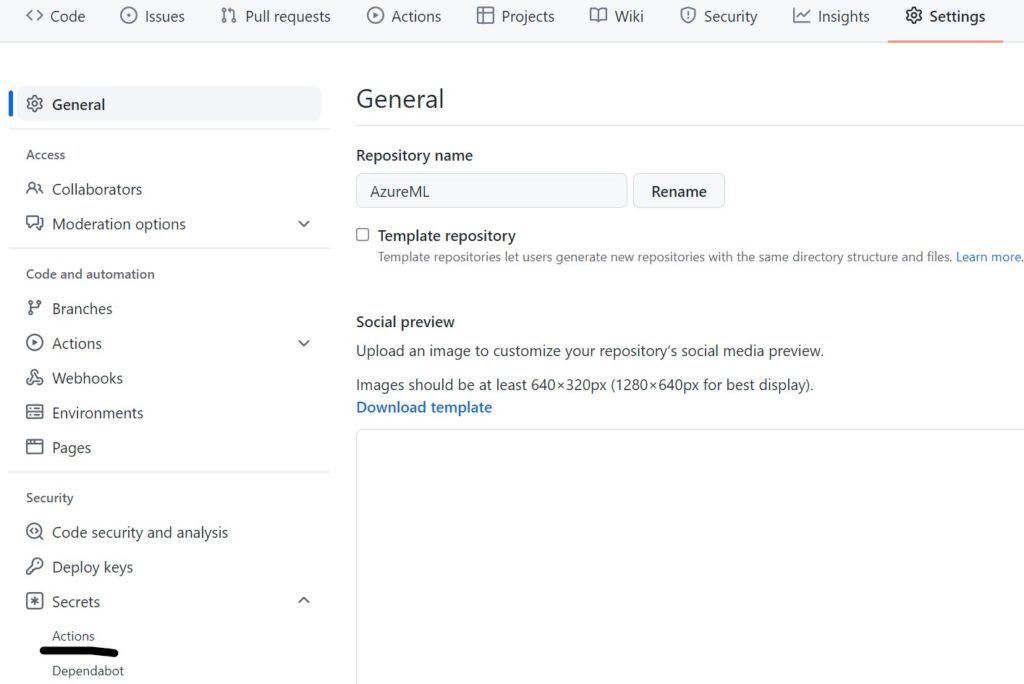
In your repository settings go to secrets and then click Actions.
Then the list of secrets and the button for adding new secrets will be displayed. If you click on it, the following screen will appear:

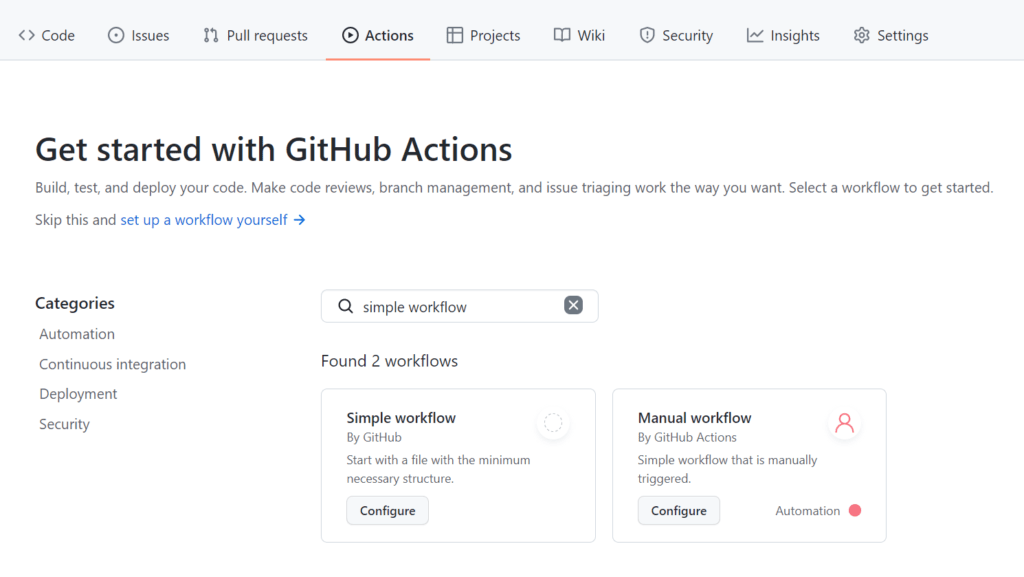
Now that we have set the secrets, we can configure the Action by going to Actions and then setting up a simple workflow.
Name the file and copy the following text that uses the Azure login Action:
name: Run Azure Login with OpenID Connect
on: [push]
permissions:
    id-token: write
jobs:
    build-and-deploy:
    runs-on: ubuntu-latest
    steps:
    - name: 'Az CLI login'
      uses: azure/login@v1
      with:
          client-id: ${{ secrets.AZURE_CLIENT_ID }}
          tenant-id: ${{ secrets.AZURE_TENANT_ID }}
          subscription-id: ${{ secrets.AZURE_SUBSCRIPTION_ID }}
    - name: 'Run Azure CLI commands'
      run: |
          az account show
          az group list
          pwd
b) Use the Azure login Action with a service principal secret
The second method is much simpler but requires saving credentials in GitHub for each repository. This time all that is needed is a GitHub Action secret that stores all the information you have received and is named AZURE_CREDENTIALS.
To use service principal secrecy for authentication in Azure, use a workflow Action like the following:
on: [push]
jobs:
  build-and-deploy:
    runs-on: ubuntu-latest
    steps:
      - name: Log in with Azure
        uses: azure/login@v1
        with:
          creds: '${{ secrets.AZURE_CREDENTIALS }}
Unfortunately, at this moment Terraform does not support authentication using az cli with service principal and therefore it is required to use secrets for service principal to run Terraform deployment.
You should now be able to commit the changes, which in turn triggers a workflow run. This should run without errors and with the output of the commands from the last step.
3. Add example Terraform file
To fully demonstrate the creation of resources, we will add a small Terraform script which just adds a resource group to the desired location in Azure. Create a file on the root of the repository named main.tf with the next contents:
# Configure the Azure provider
terraform {
  required_providers {
    azurerm = {
      source  = "hashicorp/azurerm"
      version = "~> 2.65"
    }
  }
  required_version = ">= 1.1.0"
}
provider "azurerm" {
  features {}
}
resource "azurerm_resource_group" "rg" {
  name     = "myTFResourceGroup"
  location = "westeurope"
}
As soon as you commit the changes, a workflow run is executed, but it only provides the same output as before.
4. Create Terraform Service Principal
For Terraform, we need to create a service principal, just like we did to connect to GitHub.
sp="sp-datainsights-external-dev-terraform"
subscription="datainsights-external-dev"
az ad sp create-for-rbac \
    --name $sp --role contributor \
    --scopes /subscriptions/$(az account show --subscription $subscription --query id -o tsv)
    {
       "appId": "00000000-0000-0000-0000-000000000000",
       "displayName": " sp-datainsights-external-dev-terraform",
       "name": "",
       "password": "0000-0000-0000-0000-000000000000",
       "tenant": "00000000-0000-0000-0000-000000000000"
    }
5. Store credentials in Key Vault and set policy
We are going to store the appId as client-id and password as client-password in your already created Key Vault for later retrieval, and since we have connected to the Azure subscription, all that is left is to set a policy for accessing the secrets.
az keyvault set-policy -n --secret-permissions get list –spn
6. Adjust workflow to deploy Azure Resources using Terraform
Now we can modify the workflow file as shown below. This time we use the Key Vault Action in the second step to retrieve the secrets, which are then referenced by the Terraform Deployment step and set as environment variables. Make sure you change the name of the Key Vault to your own name:
name: Run Azure Login with OpenID Connect, get secrets from key Vault, and do terraform deployment
on: [push]
permissions:
      id-token: write
jobs:
  build-and-deploy:
    runs-on: ubuntu-latest
    steps:
    - name: 'Az CLI login'
      uses: azure/login@v1
      with:
          client-id: ${{ secrets.AZURE_CLIENT_ID }} # Secrets defined
          tenant-id: ${{ secrets.AZURE_TENANT_ID }} # in GitHub Settings
          subscription-id: ${{ secrets.AZURE_SUBSCRIPTION_ID }}
    - name: 'Get secrets from key Vault'
      uses: Azure/get-keyvault-secrets@v1
      with:
        keyvault: "keyvaultname"
        secrets: 'client-id, client-password'
      id: GetSecretAction
    - name: 'Checkout'
      uses: actions/checkout@v2
    - name: 'Terraform deployment'
      run: |
        terraform init
        terraform validate
        terraform plan
        terraform apply
      env:
        # Secrets for connecting Terraform provider to Azure
        ARM_CLIENT_ID:       ${{ steps.GetSecretAction.outputs.client-id }}       # Secrets from key Vault
        ARM_CLIENT_SECRET:   ${{ steps.GetSecretAction.outputs.client-password }} # Secrets from key Vault
        ARM_SUBSCRIPTION_ID: ${{ secrets.AZURE_SUBSCRIPTION_ID }}
        ARM_TENANT_ID:       ${{ secrets.AZURE_TENANT_ID }}
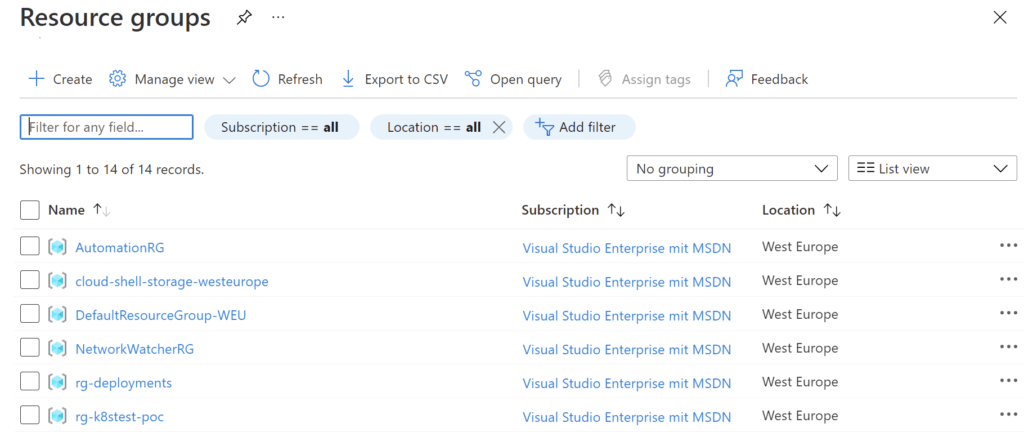
When the Terraform step is executed, the environment variables are picked up and used to create the resource group. When the workflow is complete, you should be able to see the newly created resource group in the resource groups section in the Azure Portal.
As you can see, properly configured access from GitHub repositories allows us to centralize access management in Azure and, along with KeyVault, provides us with an additional layer of security for the production environment.
With the filter in the federation identity based on repository details such as environment, branch, tags, pull requests, we can create more granular permissions. But that is a topic for another article.

